9. Grounds and Radials
- Grounds
So far, we have not mentioned ground parameters yet. That is because we have been using the ground that cocoaNEC has defaulted to.
Open the Environment sheet again, and then tab over to the Ground tab. This is what you will see:
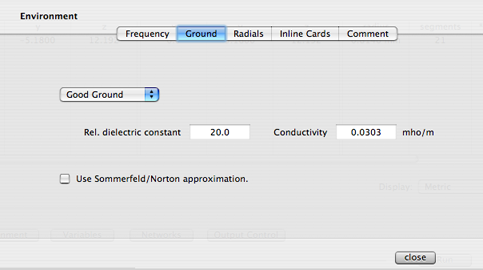
Notice that cocoaNEC has chosen as a default a "Good Ground" and displays the relative dielectric constant and ground conductivity that it has picked.
There are other grounds that you can pick from the popup menu:
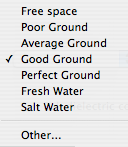
You can specify arbitrary values for the relative dielectric constant and conductivity if you pick Other... from the menu. With Other... selected, just type the two parameters into the text fields, and cocoaNEC will use them.
Notice that there is a checkbox called Use Sommerfeld/Norton approximation. If you select this option, you will in general obtain a more accurate ground model. However, the NEC-2 engine will also use more computing time. Just like the Double/Quad Precision choice in the Output Control sheet, cocoaNEC lets you make the choice of accuracy versus computing time.
- Radials
If you now tab the Environment sheet over to the Radials view, you will find various options for radials.

No radial wires are generated if you select None.
If you are modeling a ground mounted antenna, you will need to use the NEC-2 Radials option. NEC-2 places the radials center at x=0, y=0, z=0, so your vertical will have to grow from there. Notice that the x, y, and z fields will be disabled since there is no way to specify other values.
The length parameter is the length of each spoke of the radial. As with other formulas, the wire radius can be specified using a "#12" to specify a 12 AWG wire, for example.
If you select the more general Radials radio button, you can specify to cocoaNEC how you would like a set of radial wires to be generated. cocoaNEC will generate these using the same wire geometry specification, but it saves you the chore of generating them yourself, and as you shall see a little later on, there are some output options that you can choose which are not available if you had manually generated your own radials.
The center of the radials is specified by the x, y and z parameters. These will take formulas using the same Variables that you use in the rest of the spreadsheet. The NEC-2 engine does not like the z value to be too close to actual ground (unless you have chosen "free space" or "Perfect Ground" as your ground). With a 20m vertical, you will typically have to raise the radials 12" or more above the ground.
The advantage of specifying radials with this mechanism, instead of creating the wires manually is that you can ask cocoaNEC to either display or not display the radials in the geometry plot. However, by specifying your own wires, you have greater control of how the radial segments are tapered.
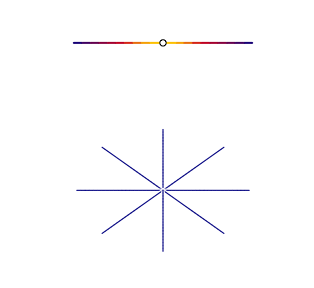
The following shows the geometry view of our dipole with a set of (8) radials under it
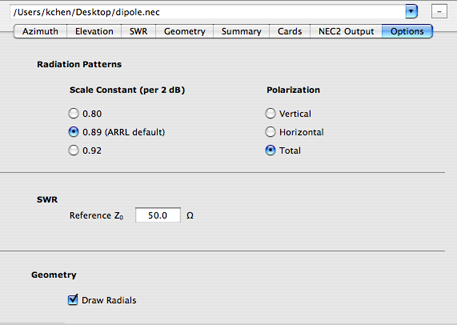
cocoaNEC defaults to not drawing radials, but you can at any time switch to drawing the radials by checking the box in Options of the Output window: