Lesson 2
This lesson will take you through the steps of modifying a simple program and building it in Xcode, then uploading the hex firmware file to the Arduino Micro.
Example Project
You should already have downloaded the Arduino Micro folder in Step 4 of Lesson 1. You should find a FirstLight Micro Project folder in the Arduino Micro folder.
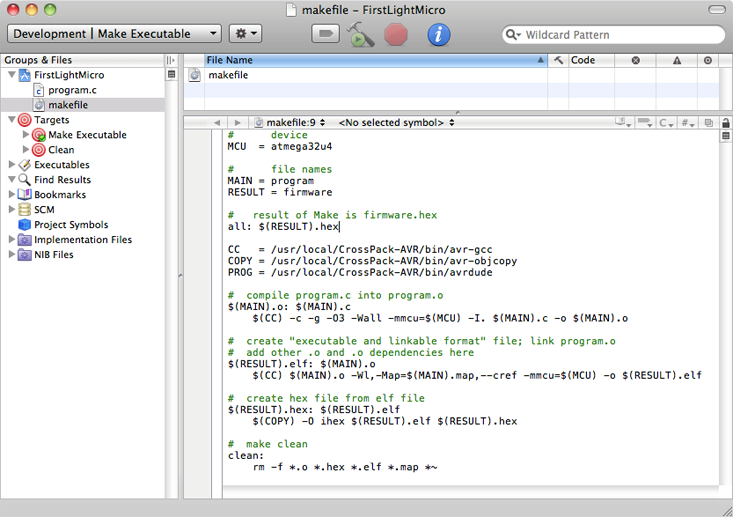
The FirstLight Micro Project folder contains an Xcode project file, FirstLightMicro.xcodeproj. Double click on the xcodeproj file in the project -- this should launch Xcode. Click on the makefile icon under the FirstLightMicro item in the Groups & Files outline view of the Xcode window and you should see this:
If double clicking on the xcodeproj file did not launch Xcode, you may not have installed Xcode correctly. Go back and follow the instructions on this page.
The two targets for this project are shown in the Group and Files outline view (the icons are concentric red/white circles). One is called Make Executable and the other is called Clean.
The Make Executable target is performed when the Build menu item (or the Command-B keyboard shortcut) in the Xcode Build menu is selected. The Clean target is performed when the Clean menu Item (or the Command-Shift-K keyboard shortcut) in the Xcode Build menu is selected.
You can inspect the targets by double clicking on the target itself. Both of the targets in this project refer to the "makefile."
You can see what is in the project's makefile (a text file in the project folder) by clicking on the makefile item in Groups and Files. You can see this in the Editor view of the Xcode window that was shown earlier (the lower right section of the Xcode window).
Notice that the makefile has been set up so that the MCU variable refers to the AVR chip that we are compiling for.
# device
MCU = atmega32u4
The names of files that are used in the project appear next.
# file names
MAIN = program
RESULT = firmware
The main program file is assumed to be "program." i.e., program.c is the C file, program.o is the compiled object file, program.map is the memory map. The result files will be called "firmware." The executable file will be named firmware.elf and the Intel format hex file will be called firmware.hex.
You can choose any other names that you wish. If your C program spreads over more than a single source file, you will need to add to the makefile. The creation of makefiles is beyond the scope of this tutorial; you can refer to this if you are interested in more advanced makefiles.
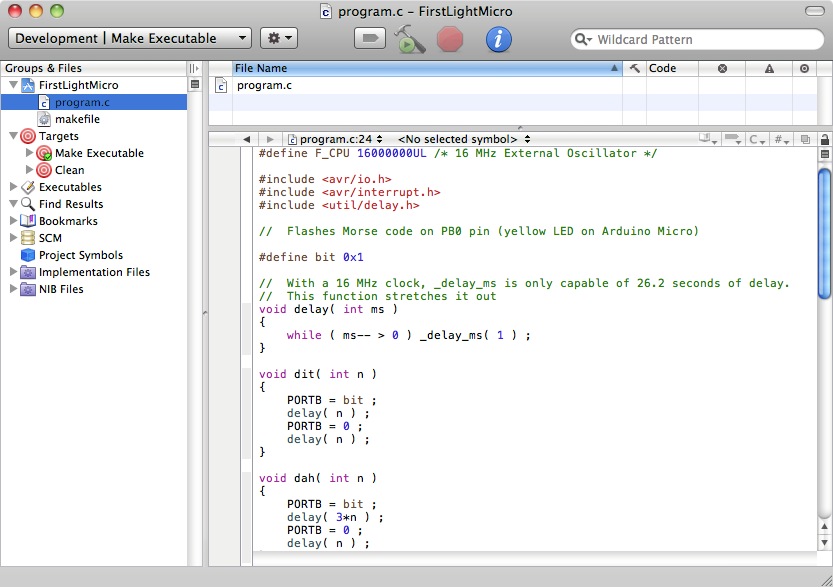
As mentioned, the program is in a file named program.c. Click on program.c in Group and Files, and the program will appear in the editor, like so:
Build the project by selecting the Build item in the Xcode Build Menu, or type Command-B.
As defined in the makefile, Xcode should send the program to gcc to be compiled, linked and create a hex file. With such a small program, the process should be virtually instantaneous.
You should now find many more files in the FirstLight Micro Project folder.

Just for fun, select Clean in the Xcode Build menu.
When you do this, all those extra files will be deleted. An inspection of the makefile will show that the clean target does just that.
Finally, Build the project again. This re-creates the firmware.hex file that you will need next.
Recall that you had saved a FirstLight.avrtools session file in Step 4 of Lesson 1. If you cannot find the file, you will need to repeat Steps 1 through 3 in Lesson 1.
Double click on the session file to launch AVR Tools and use the session parameters. Go to the Program tab and tell AVR Tools to use the firmware.hex file that is created in the FirstLight Micro Project folder by the Build command.
Save the session so that you need not repeat the above in the future.
Now follow Step 4 in Lesson 1 to upload the hex code (depress Reset on Arduino - click Upload in AVR Tools -- release Reset button on Arduino). The text view in AVR Tools should show a successful upload. But you should not notice any difference in the LED behavior from Lesson 1 since the firmware that you had uploaded in Lesson 1 was created by this same program.
Changing the Program
Click on program.c in Groups and Files to bring the program file into the Xcode editor. Notice that the main function looks like this:
int main( void )
{
long
n
;
DDRB = 0x20 ;
n = 150 ;
while ( 1 ) {
return 0 ;
}
DDRB = 0x20 ;
n = 150 ;
while ( 1 ) {
morseT(
n ) ;
morseE( n ) ;
morseS( n ) ;
morseT( n ) ;
interCharacter( n ) ;
}
morseE( n ) ;
morseS( n ) ;
morseT( n ) ;
interCharacter( n ) ;
return 0 ;
The variable n determines the speed of the Morse code.
Change the value that is assigned to n from 150 to 300. Then type Command-S to save your edit.
Build the edited program to create a new hex file. When that is completed, move over to AVR Tools and upload the hex file (Section 4 in Lesson 1). When the upload finishes, you will notice that the LED on the Arduino is now flashing at half the rate as before.
You have just created a "new" program and uploaded it into the Arduino Micro.
You can experiment further with adding other Morse characters, etc..
The development cycle is really this simple -- edit the source file (program.c), save it (Command-S), compile and build the hex file (Command-B) and make any corrections if there are errors, then move over to AVR Tools to upload it.
When the compiler detects an error, Xcode will report it in the edit window.
Good luck with developing code for the Arduino!