
AVR Tools
Kok Chen, W7AY [w7ay (at
)arrl (dot) net]
Last updated: March 13, 2013
Introduction
AVR Tools is a Mac OS X GUI that uses avrdude to program Atmel AVR
microcontrollers. With AVR Tools and Xcode, you
can do all of your development without using the Unix
terminal of Mac OS X.
In addition to a code (hex) uploader, AVR Tools includes a
terminal emulator which can be used to communicate with
serial ports, such as the serial port in the Arduino, or
the spare RS-232 port on the Atmel STK500 Development
board. The terminal emulator can be run stand-alone,
without connecting AVR Tools to any development
board.
AVR Tools also allows you to upload and save the program
memory contents, EEPROM and fuses from the AVR in hex
format.
Additionally, the Using Xcode page documents what is
needed to develop AVR programs with the Mac OS X Xcode IDE. Xcode can compile a C
program into a hex file, which can then be uploaded to
an AVR programmer by using AVR Tools.
AVR Tools is not a supported product, but simply a project
that I wrote for myself to use. If you have similar needs,
the AVR Tools application and project sources are
completely free.
AVR Tools is built as a Universal Binary application and
works natively with both the PowerPC and the Intel based
Macintosh running Leopard (Mac OS X 10.5) or newer. You can
download both the AVR Tools application and Xcode project
from the Download page. The sources in AVR
Tools are GPL free, and you are free to make any changes
that you want without the need to republish your work..
The terminal emulator (Term.m) in AVR Tools is an
Objective-C extension of the NSTextView class. It can be
used as sample code for any Cocoa application that needs to
communicate with a Mac OS X serial port through a text
view.
Included with this documentation is a set of step by step tutorials on
how to use the tools to build a working program and
upload it to an AVR on an Arduino board or an STK500 development kit.
CrossPack
CrossPack is a tool chain that includes avrdude, the
gcc compiler and libraries for the
AVR. AVR Tools assume that you will be using CrossPack.
The CrossPack page has information you
will need to install CrossPack.
AVRDUDE
AVR Tools uses avrdude to perform the
actual uploads to and downloads from an AVR programmer.
avrdude is a Unix executable that you will have to
download and install separately (see CrossPack above). AVR
Tools does not embed any of the avrdude source code; it
simply runs avrdude as a task when it needs to communicate
with an AVR programmer.
Although it has only been tested with the Arduino and the
Atmel STK500 development kit, avrdude should work with many
other AVR programmers.
In order for AVR Tools to find avrdude, you will need to
identify the location of the Development package. In the
case of CrossPack, the installer creates a
folder that is soft linked to /usr/local/CrossPack-AVR.
AVR Tools needs to know where to find the avrdude
executable file. This is done through the Preferences
window in AVR Tools.
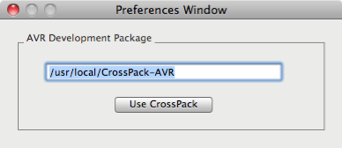
AVR Tools defaults to using the CrossPack tool chain. If
you use some other tools, you will need to change the
location in AVR Tools's Preferences.
In the case above, AVR Tools will assume that avrdude is
located at /usr/local/CrossPack-AVR/bin/avrdude.
If you have installed the tool chain somewhere else, you
can manually change your preference to be the directory
that encloses the bin directory that avrdude resides in.
You can default back to the CrossPack tool chain by
clicking on the Use CrossPack button in the
Preferences window.
Sessions
An AVR Tool session consists of a set of
selections (the location of hex file, the serial port and
type of development board, the AVR chip type which is being
programmed, etc) that can be saved and re-used in the
future.
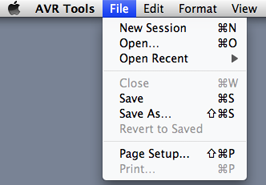
After launching AVR Tools, you can select a New
Session, or open an existing session file.
Each session can be saved (or saved into a file with a
different name). The saved file is a Cocoa dictionary
(similar to a plist file) with the properties of the
session. The saved file has an avrtools file
extension. You can also launch AVR Tools with the saved
settings simply by double clicking on the avrtools file in
the Finder.
When you select New Session, a new AVR Tools
session window will appear, showing the Program
tab. The Upload button in this tab view is used to
program new firmware into your AVR.
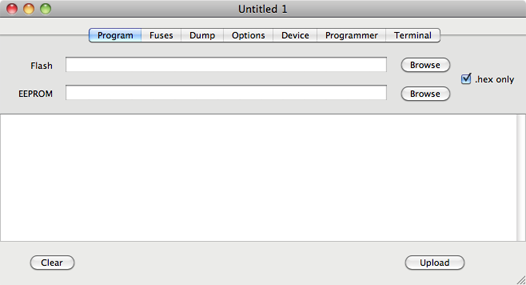
Use a Browse button to select a hex file to upload
to the programmer.
To clear either the Flash (program) or the EEPROM fields,
click Browse button and then Cancel from the file open
dialog. That will clear the corresponding text field. AVR
Tools avoids touching the memory of a hex file field that
are not defined..
If the file that contains the hex code does not use the
.hex extension, uncheck the .hex
only checkbox. With the .hex only
selected, all other files (except folders) are grayed out,
making it easy to find files with the .hex extension.
The scrolled text view under the text fields contains the
console log from avrdude. The Clear
button at the bottom left of the window clears this log.
You can cut and paste from this log, but text that is typed
into this text view will be ignored. If you want to talk
directly to the STK500 programming port, you can use the
Terminal emulator (described later).
If this is a newly created session, you will need to first
fill a few other items in the other tab views before you
click on the Upload button.
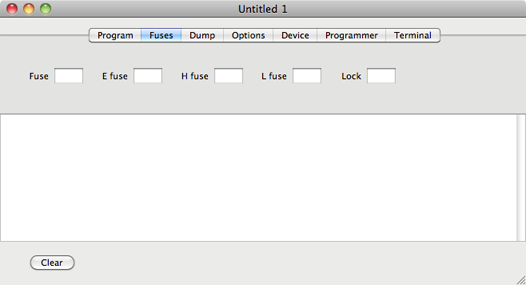
The Fuses tab lets you set the fuses in the AVR
chip. You will usually not need to change the default fuses
that are shipped in the chip. If you leave a fuse field
empty, that fuse will not be touched. If you want a fuse to
be programmed, enter a two digit hex value, such as
62 or bf.
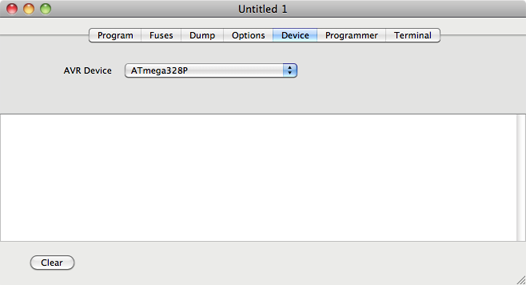
The Device tab contains a popup menu for you to
select the AVR chip that you are programming.
The Programmer tab lets you select the development
board that you are using for programming, together with the
serial port it uses. avrdude supports a number of
programmers, although I have only tested AVR Tools on the
Arduino UNO, Arduino Micro and the Atmel STK500.
Please make sure that you select the "Version 2" STK500 (as
shown below) if you have a more recent STK500. If you
select the original Atmel STK500 from the popup
menu, avrdude will take extra time to discover that it
really is talking to a version 2 board. If you choose to
use the high voltage programming function on the STK500,
you will need to select the high voltage version of the
STK500 in the popup menu.
You need to select the serial port (either a serial adapter
or a USB port on the programmer) that you are using to
communicate with the programmer.
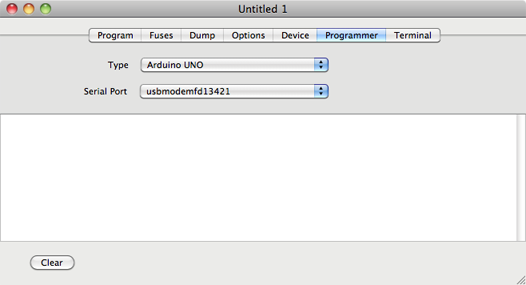
The example below shows the Arduino UNO selected as the
programmer, and using the Arduino's USB-serial port
(identified by the string "usbmodem" followed by the
location (fd12421) of the USB connector in the Macintosh's
USB tree).
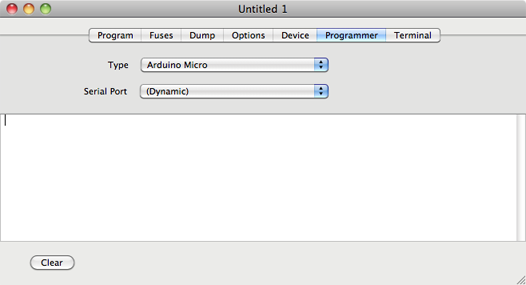
The Arduino Leonardo and Arduino Micro do not have a
permanent serial port. The programming port is implemented
with the onboard USB interfaces of the main microprocessor
itself. That port is only active for the first 8 seconds
after you press and release the Reset button on the Arduino
board. After that, the port disappears, unless the
currently running program has opened the port.
For programmer that do not have a permanent serial port,
AVR Tools include a Serial Port menu item called
"(Dynamic)" as shown in the example below:
We will later describe how to make use of the
dynamic port function.
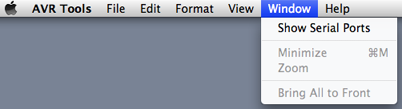
With programmers that have a permanent serial port, if you
are not sure of the port name of the programmer you can
find it by getting a list of serial ports. Select the
Show Serial Ports item in the Window menu:
This should bring up a Serial Ports window. By removing the
USB adapter of the programmer that you will be using, you
should see a Removed message with the name of the
port, as shown below:
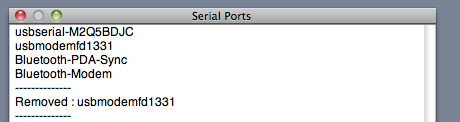
(The example above is again associated with an Arduino
device.) When you plug the device back in, the window
should report that the port has been Added.
You can download what is currently in your AVR chip by
using the Dump tab.
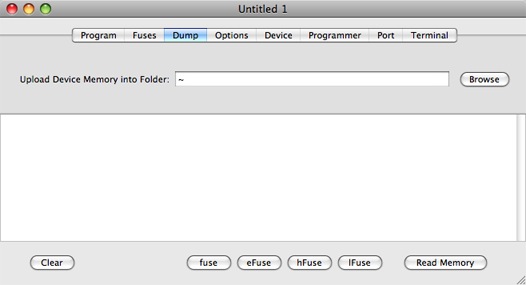
The Read Memory button will download the Flash and
EEPROM memories into two Intel formatted Hex files called
avrFlashFile.hex and avrEepromFile.hex.
The location the files are downloaded to are selected by
using the Browse button; it is defaulted to your
home folder.
Note that with an Arduino Leonardo and Arduino Micro, the
"dynamic" serial port address requires you to treat the
Read Memory button the same way as the Upload
button as described in the dynamic Upload Code procedure below.
Read Memory is useful to save a program that has
been downloaded by a different program. With an Arduino,
you can upload a Sketch (e.g., ArduinoISP) using the
Arduino Java program, and then download the flash memory in
AVR Tools so that, you can upload the program by using AVR
Tools in the future, and not need to run Java.
Each of the fuses (if it exist) is downloaded and displayed
in green into the log window. The following shows the Fuse
Extended Byte (eFuse) that is dumped (value is 01 hex) from
a new ATmega168:
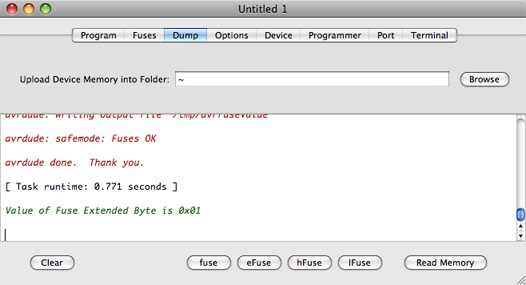
(AVR Tools actually asks avrdude to read the fuse into a
file in your /tmp directory. AVR Tools then reads the file
back from /tmp when avrdude is done.)
If you get a message that the fuse does not exist, you
might check if the log shows any errors. For example, if
ATtiny85 is chosen as the device and the
ATmega168 is in the programmer's socket, you might
see the log below:
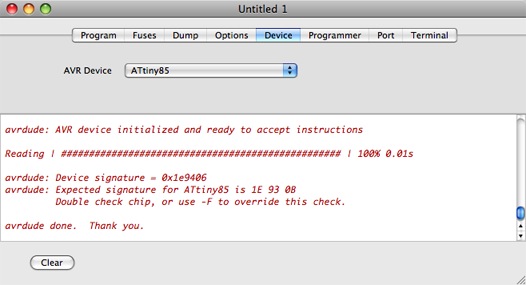
Notice in the above, that avrdude says that it has
read back the device signature from an ATmega168
instead of the device signature that it expects from an
ATtiny85.
Uploading Code
Once all devices and ports have been set up, go back to the
Program tab and click on Upload. You
should see avrdude's progress printed to the log
text view. Once you have saved this session into a file,
and open the session at a future date, you will not need to
do any setups. All the fields are saved into the session
file.
If you are using the Arduino Leonardo or the Arduino Micro,
follow the procedure in the next section.
Uploading Code to a
Programmer That Does Not Have a Permanent Serial
Port.
Like the Arduino UNO, the Arduino Leonardo
and Arduino Micro implement the serial port as a USB CDC Class device with a
mircoprocessor. However, the serial port for the
Leonardo and Micro are not implemented with a separate
micro processor like in the UNO.
As a result, when the reset button of the Arduino Leonardo
and Micro are depressed to enter the Bootloader mode, the
serial port on them also vanish.
The serial port is only active for the first 8 seconds
after you press and release the Reset button on the
Leonardo and Micro boards. After that, the port again
disappears, unless the currently running program has opened
the port.
Since the serial port is available only momentarily, AVR
Tools implements a "dynamic" scheme to discover the serial
port and connect to it. The Programmer port is set to
"(Dynamic)".
To upload code to the Arduino Leonardo or Arduino Micro:
- Press the Reset button on the Arduino board.
Keep the Reset button depressed until
step 3.
This removes the Arduino serial port from the Macintosh's IOKit list.
- Click on the Upload button in AVR Tools.
If "(Dynamic)" is selected as the Programmer's port, AVR Tools first makes a list of existing serial ports. It then waits until a new serial port appears. If AVR Tools does not see a new serial port within 8 seconds, it will stop the upload process and display a warning Alert window.
- Release the Reset button on the Arduino within 8
seconds of clicking on the Upload button.
This should create a new serial port. AVR Tools will see the new port and use it to to upload the binary hex code to the Arduino.
Follow the same process to read the flash memory on the Arduino. In this case, click on the Read Memory button instead of the Upload button in AVR Tools.
Saving sessions
You can save the session to a file (a file with .avrtools extension) that contains the name of your current hex files, fuses, device, programmer and serial port settings. You can for example save this together with your AVR project so you would not need to set everything up again in the future. Use the Open... or Open Recent in the AVR Tools File menu to open this saved session.
You can also double click on the session file to launch AVR Tools and open the session file. If you have not previously saved a session file, a Save will behave as Save As... .
A saved AVR Tools session file has the following Finder icon:

Terminal Emulator
AVR Tools comes with a terminal emulator. To start the emulator, click on the Terminal tab of the session window. You will be presented with the serial port parameters (these parameters are also saved to the session file):

Click on the Open Connection button when all the parameters are set up. This will open a separate emulator window. Anything that you type in that second emulator window will go out on the serial port and anything that the serial port receives will be printed to the text view in the emulator window. If you have selected the crlf checkbox, each newline that you type will be sent to the serial port as a pair of carriage return/linefeed characters.
The serial port is disconnected when you close that second emulator window.